
Essential Tools for Xenharmonic Music
Are you itching to dive in and compose some xenharmonic music, that is, to use scales that have more, or less, notes per octave than our standard twelve-tone tuning? I sure hope so because it is a largely unexplored musical universe with a lot of room for composers to find their niche.
There are many directions to explore, and it really depends on the mindset of each musician as to where to begin. One area is that of “just tunings” where most intervals are perfect ratio combinations of the harmonic series, so that chords are as in tune as possible with very little beating. This is where the mathematically inclined musical purists gravitate.
Another direction to explore is that of equal temperaments where tunings consist of an octave divided equally by any number of scale degrees. We say “19edo” to mean 19 equal divisions of the octave. (Back in the ’90s and early 2000s, it was more popular to say “19-tone equal temperament” or “19tet”.) My favorites are 10edo, 16edo, and 17edo. This is my world, where there is no need to sweat over ratios or technicalities, but to just play by ear and enjoy the distinct flavor of each tuning.
In the past it was easier to find synthesizers that could be tuned to equal temperament than ones that allowed for the full tuning of individual notes across the keyboard. But nowadays many synthesizers will do either one just as easily. Technology is certainly further along than when I began composing xenharmonic music. In 1990, I used hardware synthesizers and standard keyboards. It was so exciting that it didn’t seem like too much trouble at the time, but nowadays it is a far more streamlined experience.
For example, it used to seem normal to put stickers on my keyboard keys to keep track of where the octaves were for any given tuning. It’s easy to see where octaves are on a piano because of the black/white note pattern of the keys–a well-thought-out decision of long ago. Xenharmonic tunings would not only need a greater or lesser number of keys per octave, but the musician has a choice as to which keys are the “diatonic keys” (white keys) and which should be “accidentals” (black keys), and therefore what the black/white note pattern should be. I will talk more about this in my final post next week, but just imagine staring at a regular piano keyboard and trying to write 17-note-per-octave music. It was strange, but we used to do it that way–with stickers!
And I used to patiently navigate through the maze of editing pages on my hardware synthesizers’ tiny screens to access the “slope” or “keytracking” or “keyfollow” of each oscillator, in order to adjust how much the pitch rises as one plays up the keyboard. Depending on the synthesizer, the slope might anchor on a different arbitrary “root note” (such as middle C or A440). So different synths wouldn’t be in tune with each other until their individual “master tuning” was adjusted by ear, tuning the whole keyboard up or down uniformly until it audibly matched every other synthesizer. “It’s close enough for rock’n’roll,” I would say. And it was! But the whole experience was not for the weak willed. Only we musicians who were determined and slightly eccentric thought it was fun.
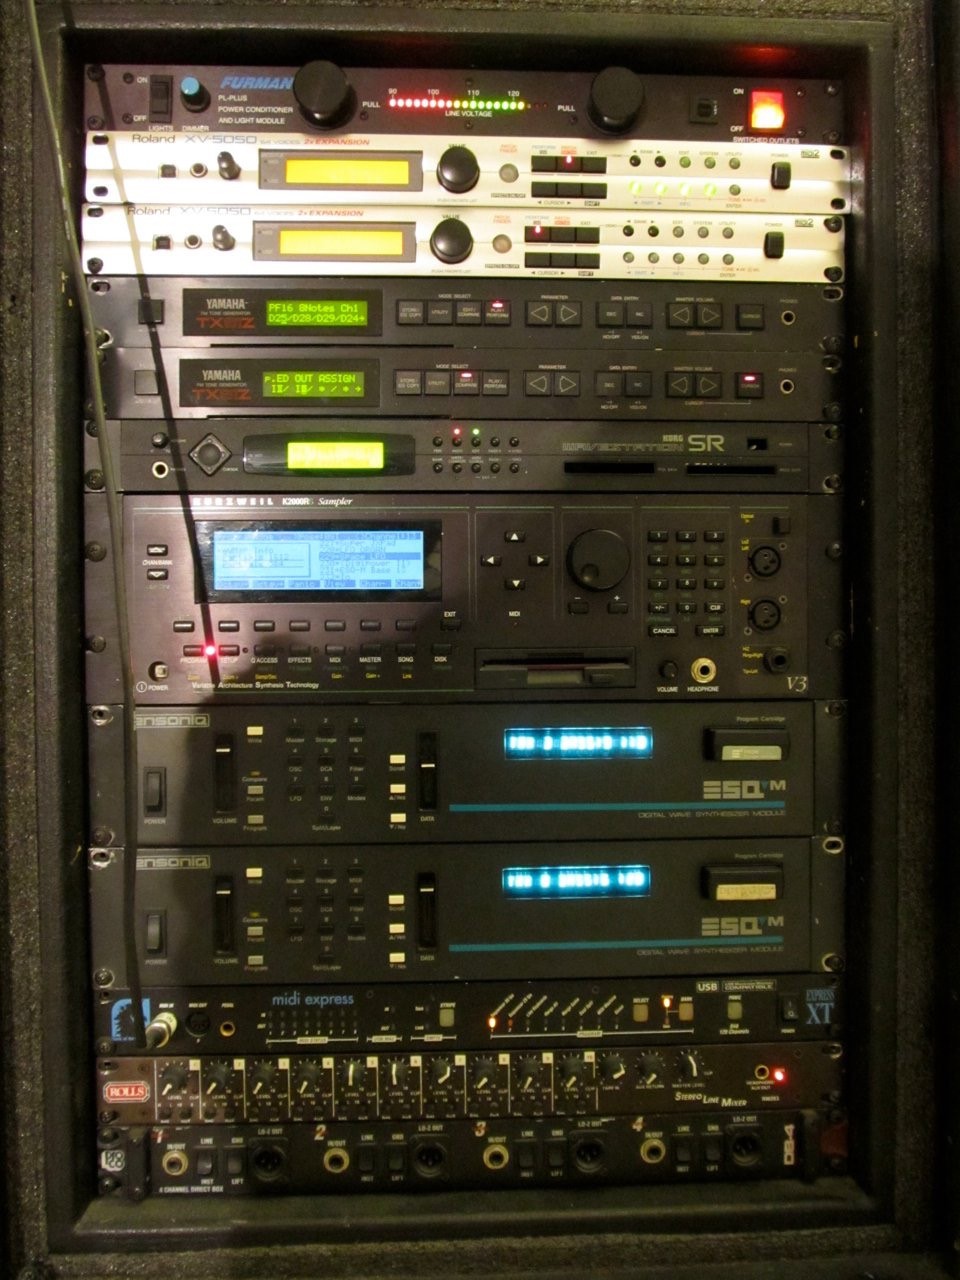
The old days of hardware synths. Or maybe you’re a geek like me. I sometimes still use them!
But things are way easier now! These days many of us rearrange the black and white keys on our keyboards to match each specific tuning. Inexpensive lightweight keyboard controllers didn’t exist back in the day, nor did eBay, but now it’s not hard for someone with a tight budget to eventually collect a few $50 keyboards and arrange them for their favorite tunings (or ask one of us in The Xenharmonic Alliance community to rearrange a keyboard for you). As for sounds, now we simply call up a “tuning file” on any number of software synthesizers that can be had for a fraction of what we used to pay for hardware synthesizers–and the tunings are accurate!
Indeed, nowadays anyone can dive right in and give xenharmonic music a shot. But before you get started, you’ll need a starting place. Are you a just intonation-minded person, or an equal temperament type? Are you an acoustic musician, an electronic musician, or interested in both? Many xenharmonic composers intermix with different types of musicians, partly because there are so few xenharmonic musicians around, but also because the mix of electronic production and the organic expression of the acoustic world can mesh very nicely.
Let’s start with your own acoustic instrument if you have one that doesn’t have fixed frets or keys, such as a violin, cello, harp, trombone, slide guitar, or your voice, etc. For advice on what tunings would be best to try for your specific instrument, and advice for how to tune your instrument if need be, I would highly suggest posting a note to The Xenharmonic Alliance on Facebook. You will get answers fast. Don’t be shy! It is a very friendly and helpful community. Perhaps you want to try building a custom instrument? The community can help you with that, too.
For acoustic instruments, you will need a list of frequencies for whichever tuning you’d like to try. If you don’t manage to get this info directly by asking The Xenharmonic Alliance community, software such as Custom Scale Editor for Macintosh, or Scala for Windows or Linux, will allow you to generate tuning charts. Once you figure out what tuning you want to try, and how best to tune your instrument, I suggest using a hardware or software Hertz-reading tuner and a microphone to tune your instrument. A laptop with a built-in microphone would be most handy for that. Another approach is to use a VST synthesizer with your tuning loaded, and with a clean sound, tune your acoustic instrument by ear to match the synthesizer notes.
What is a VST synthesizer? It’s an opportunity to get free xenharmonic-friendly synthesizers, that’s what! It stands for Virtual Studio Technology and is an audio plugin standard created by Steinberg in 1996 that allows third parties to create their own software plugins for free or commercial use, so there are a gazillion of them out there. There are other virtual synthesizer formats, but none have as many free instruments available or work with as many different music programs, so I will just list VST-capable synths here.
Even if you are an acoustic musician, I suggest expanding your xenharmonic universe into the digital world because there will be more choices of tunings and sounds. And vice versa. Synthesizers are my world, but I very much enjoy the organic nature of performing alongside acoustic musicians.
You’ll need a VST host software application in order to load and play VST synths. Normally this would be a sequencing program such as a Digital Audio Workstation (DAW). Ableton Live, Logic Pro (Macintosh-only), and FL Studio (PC-only) are highly recommended. These programs will not only allow you to record MIDI tracks (also known as Instrument tracks) but will also allow you to record audio tracks of your acoustic instruments. Here is a bigger list of VST host music software. I personally use Ableton now, and it’s nice because it has a built-in tutorial that steps you through the learning curve using its own demo song. I used Pro Tools for a number of years, and Ableton is a bit different, but the tutorial made it easy to make the transition.
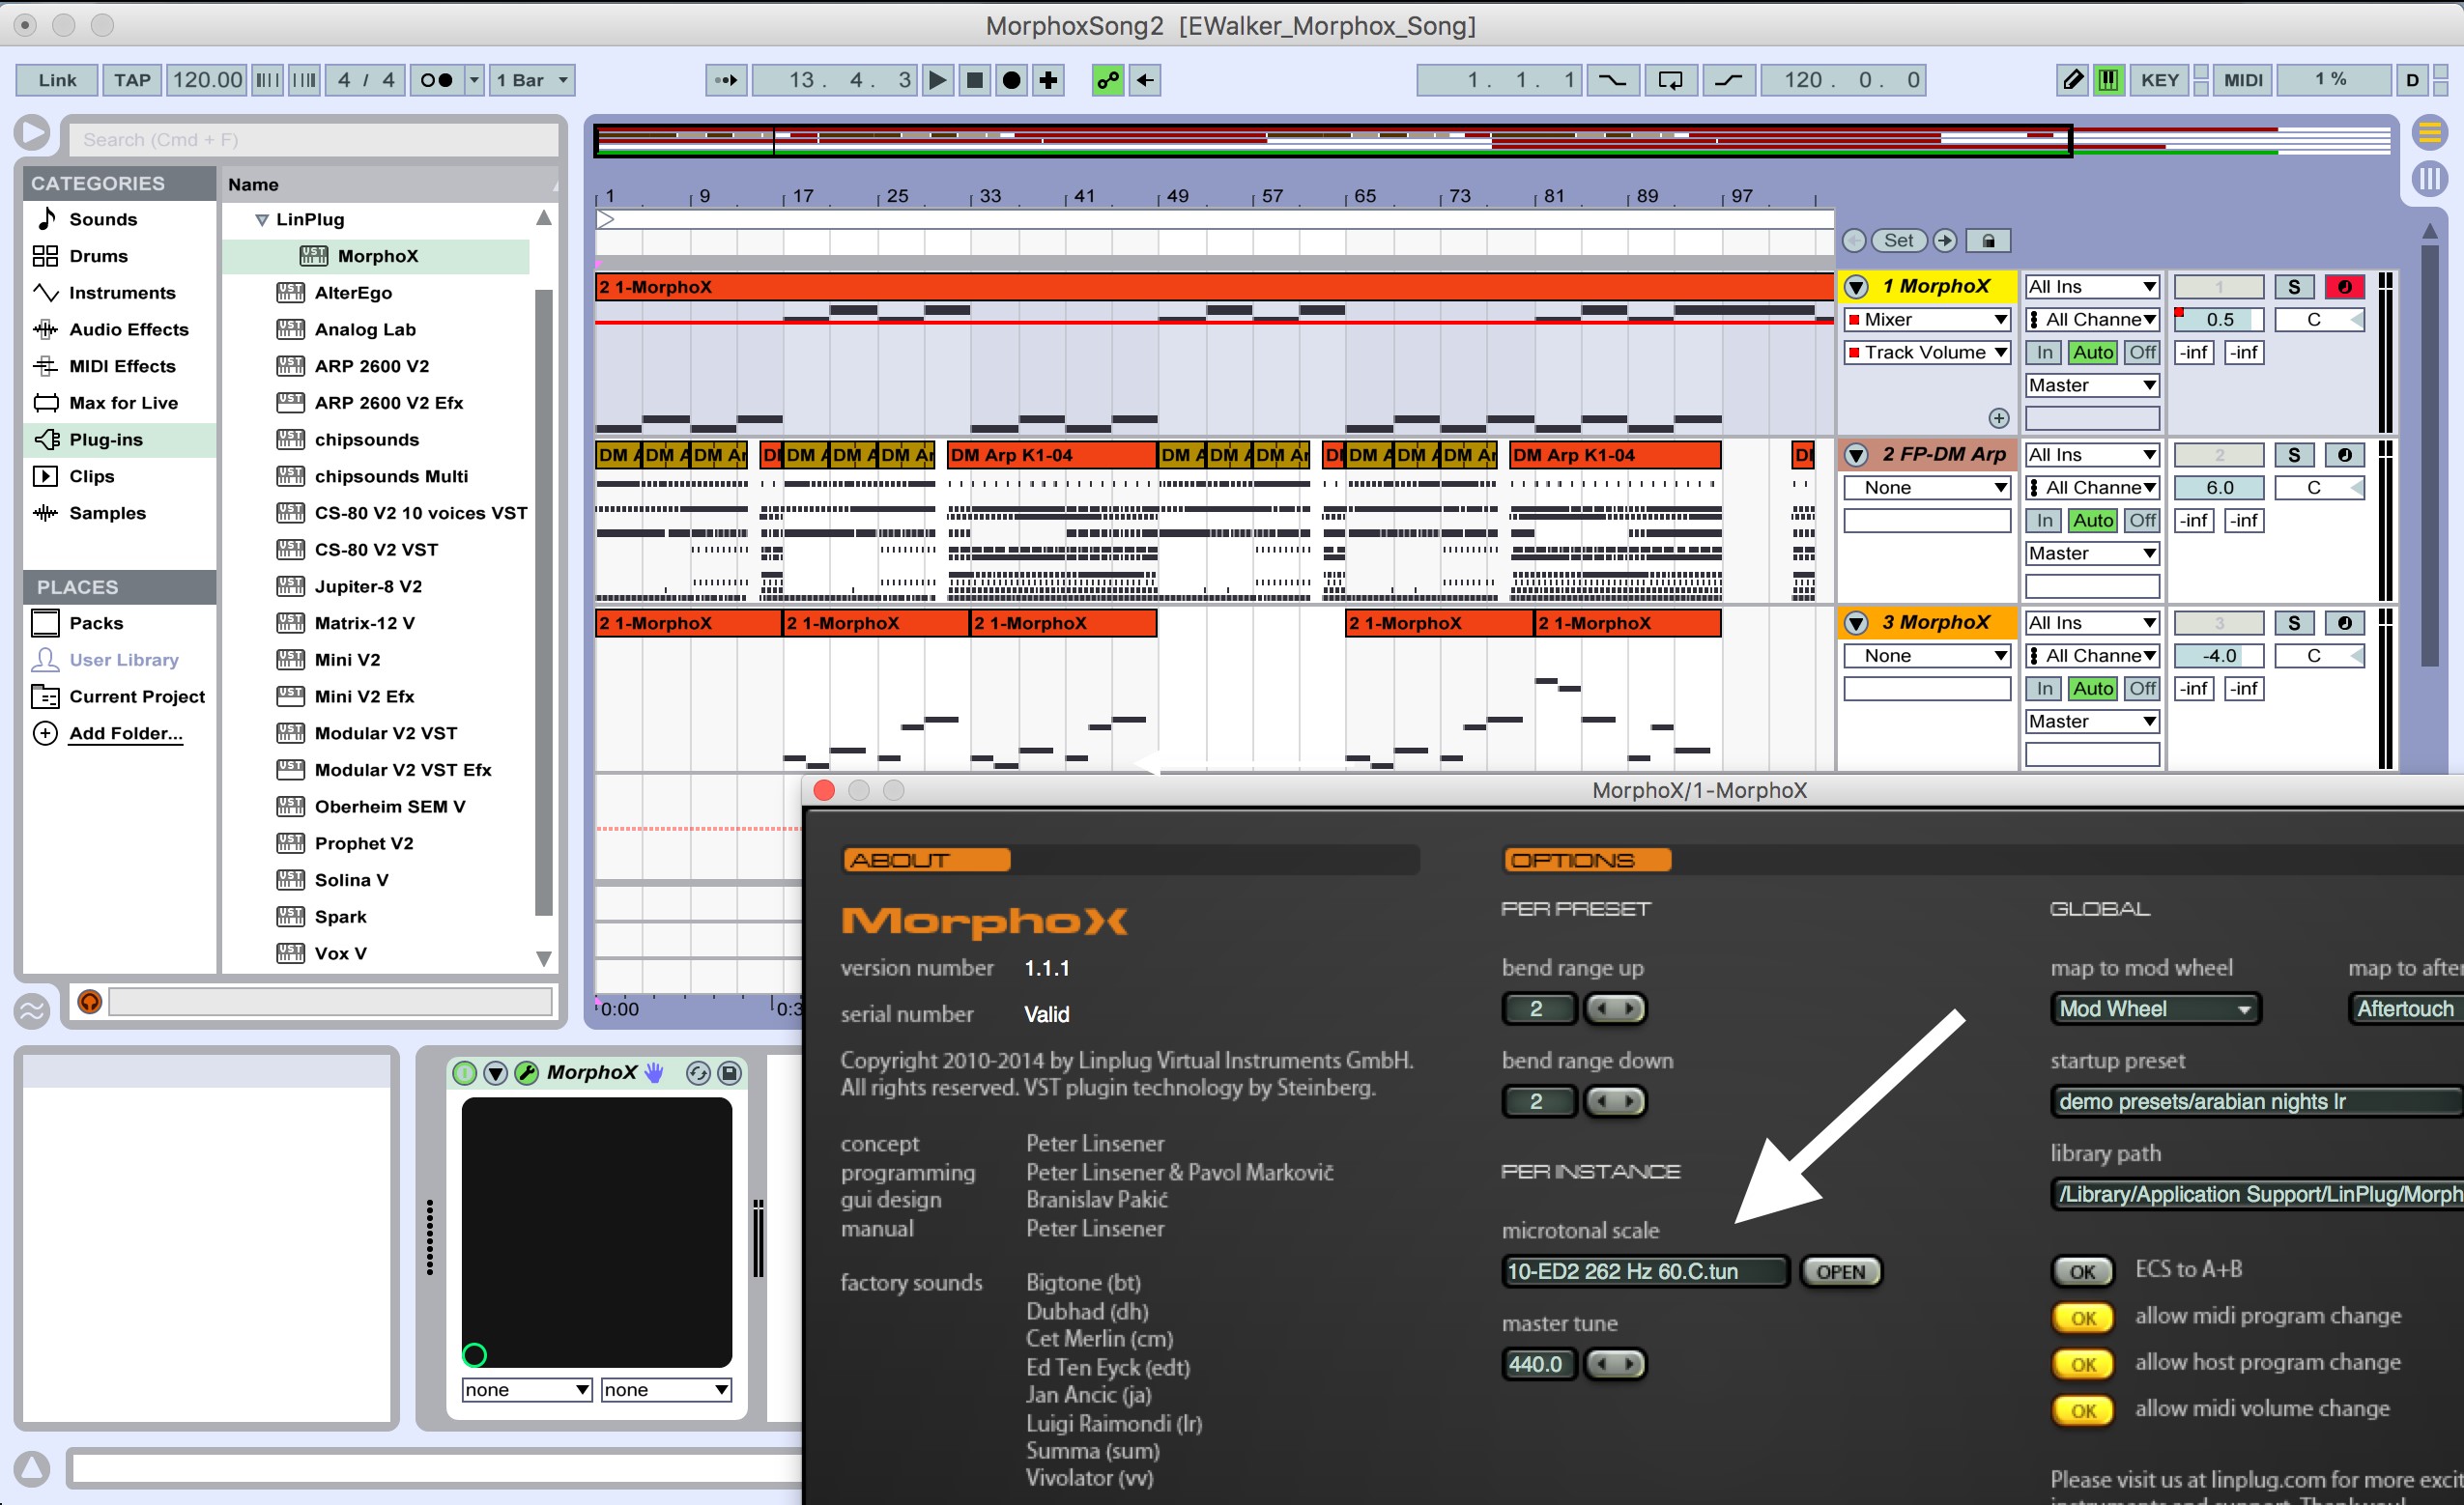
Ableton Live (the VST host software, or “DAW” that I use) and the options page of LinPlug’s Morphox synthesizer, showing where the tuning file is selected.
And below I will list a few VST synthesizers that I either own myself or that have gotten great reviews from trusted musician friends. As I mentioned earlier, you can simply call up a tuning file (.tun) from each synthesizer, which will automatically tune it. No more fiddling around with the individual controls to get each synthesizer microtuned in addition to getting each synth in tune with the rest. With tuning files, all of your synths will have the same “root note” frequency from which the entire tuning is based, and therefore your synths will match each other.
Many synthesizers can navigate to any directory to grab tuning files (such as 19edo.tun, bohlen-pierce-scale.tun, etc.), so I recommend having one master “Tuning Files” folder for all of your synths to share, except for the ones that need the tuning files to be in a specific directory. While we’re on the topic, go ahead and download this folder of Tuning Files and put it somewhere that you’ll remember, such as your music directory. For the more picky synthesizers, I will include the directory path where you’ll need to place your tuning files, because that piece of the puzzle can be hard to find in any documentation or online search.
Linplug’s Morphox is my current favorite VST. When you open Morphox you will see the main synthesizer controls, which you can ignore for now. Simply click on the “Options” button on the bottom right to open the back panel. Here you will find the “Microtonal Scale” section. Click the “Open” button next to it and navigate to your tuning files folder, then select the tuning you want. On the main page, click on “Demo Presets” at the bottom and explore the different factory sounds! Some of the arpeggiated sounds may sound a bit off because they were programmed for twelve tones, but this can all be adjusted once you get to know the synth a bit better. For now, just stick to the ones that sound good.
U-He’s Zebra2 is another favorite of mine. Zebra needs a tuning folder to be located here for PC: /program files/u-he/Tunefiles, or for Macintosh: /Library/Application Support/u-he/Tunefiles. When you open Zebra, you will see the “Voice MicroTuning” menu in the “Global” section on the bottom left. Click to open that window, and if it looks blank or you’re having trouble seeing the tuning file that you want in particular, control-click on “User” and select “Reveal in Finder”. The directory where the tuning files need to be will pop up. Copy your .tun files from you master tuning files folder here, and you’ll be good to go.
Alchemy is the most powerful sample-manipulation instrument in Logic Pro. Load your micro tuning files into the tuning folder located here: Program Files/Camel Audio/Alchemy/Libraries/Tuning.
Spectrasonics Omnisphere2 is highly recommended by my brother who is a top notch Las Vegas musician, composer, and producer. Omnisphere is one of his favorites. Load your micro tuning files for Windows here: Program Files/Spectrasonics/STEAM/Omnisphere/Settings Library/Presets/Tuning File. Or, for Macintosh: Library/Application Support/Spectrasonics/STEAM/Omnisphere/Settings Library/Presets/Tuning File/. Make a new folder in this tuning file folder, and place your .tun files there.
So there you have it. Get hold of a music-sequencing program that works for you and a synthesizer or two that reads .tun files. And if you are an acoustic musician, get ready to experience your instrument in a whole new way. Next week I will talk more about specific tunings that are great for the beginner and xenharmonic composition techniques. I will also show you how to rearrange the keys on an affordable MIDI keyboard controller and more.